Laminate floor installation has become increasingly popular due to its durability, affordability, and aesthetic appeal. Achieving a flawless finish, however, requires meticulous planning, precision, and the right techniques. In this guide, we provide detailed, expert advice on how to install laminate flooring efficiently and professionally.
Key Takeaways
Proper preparation, including acclimation and subfloor leveling, is essential for flawless installation.
Staggering planks enhances aesthetics and structural stability.
Expansion gaps are crucial to prevent buckling and warping.
Transition strips provide seamless connections between different flooring types.
Regular maintenance extends the life and appearance of laminate flooring.
Why Choose Laminate Flooring?
Laminate flooring offers an ideal blend of style, functionality, and ease of maintenance. It replicates the look of hardwood, stone, or tile at a fraction of the cost. Additionally, its scratch-resistant surface and moisture-resistant core make it suitable for high-traffic areas such as living rooms, kitchens, and hallways. Its interlocking system also simplifies the installation process, making it a popular choice for DIY enthusiasts and professionals alike.
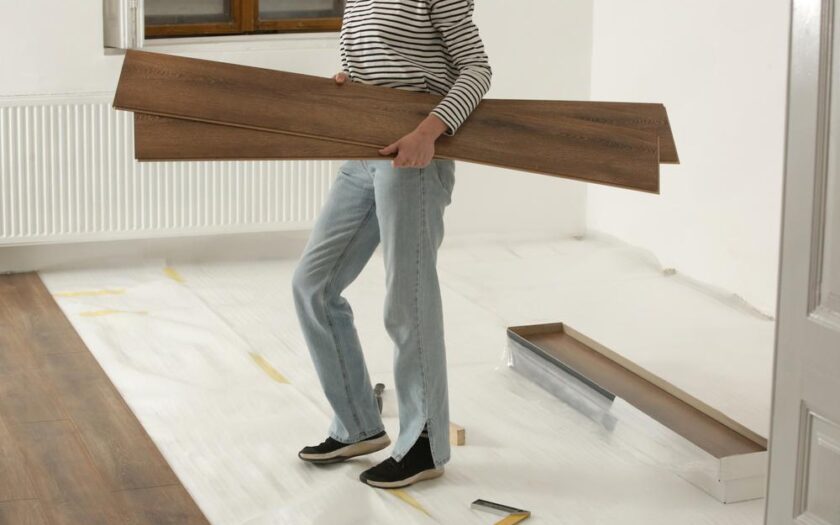
Preparing for Laminate Floor Installation
Proper preparation is crucial for a successful laminate floor installation. Begin by measuring the area accurately to calculate the amount of flooring needed. Add at least 10% to your total measurement to account for cutting errors and waste. Ensure that the subfloor is clean, dry, and level. Uneven surfaces can lead to squeaks and damage over time.
Before installation, allow the laminate planks to acclimate to the room’s temperature and humidity for at least 48 hours. This prevents warping or buckling after installation. During this time, inspect each plank for defects.
Essential Tools and Materials
To achieve a flawless laminate floor installation, you will need the following tools and materials:
Laminate flooring planks
Underlayment (for cushioning and moisture barrier)
Measuring tape
Utility knife
Spacers
Tapping block
Pull bar
Hammer or mallet
Jigsaw or miter saw (for cutting planks)
Adhesive (if required by the manufacturer)
Installing Underlayment
Underlayment is essential for providing cushioning, reducing noise, and acting as a moisture barrier. Begin by cleaning the subfloor thoroughly. Roll out the underlayment across the room, ensuring that the edges are butted together without overlapping. Secure the seams with adhesive tape to prevent movement during laminate floor installation.
Step-by-Step Laminate Floor Installation
Planning the Layout
Start by deciding the direction in which to lay the laminate planks. Typically, laying the planks parallel to the longest wall or in the direction of natural light enhances the room’s visual appeal. Dry-fit a few rows to ensure the layout looks balanced and adjust accordingly.
First Row Installation
Begin along the most visible wall, placing spacers between the wall and the planks to maintain an expansion gap of at least 1/4 inch. This gap accommodates natural expansion and contraction due to temperature and humidity changes. Lock the planks together by angling them and snapping them into place. Ensure the first row is straight and stable, as it sets the foundation for the rest of the installation.
Staggering the Planks
To create a more natural and visually appealing look, stagger the planks in adjacent rows. This involves offsetting the end joints by at least 12 inches. This not only enhances aesthetics but also strengthens the floor’s stability.
Completing the Installation
Continue installing the remaining rows, ensuring a tight fit between planks using a tapping block and mallet. For the final row, measure and cut the planks to fit, maintaining the expansion gap. Use a pull bar to secure the last row in place without damaging the walls.
Cutting Around Obstacles
During laminate floor installation, you may encounter obstacles such as door frames, vents, or columns. Measure and mark the required cuts accurately on the planks. Use a jigsaw for curved cuts or intricate shapes. For door frames, undercut the casing to allow the laminate to slide underneath for a clean, professional finish.
Installing Transitions and Moldings
To achieve a flawless finish, install transition strips and moldings where the laminate meets other flooring types, such as carpet or tile. These strips cover expansion gaps while providing a seamless and safe transition. Baseboards or quarter-round moldings can be added to conceal gaps along the walls.
Post-Installation Tips
After completing the laminate floor installation, remove the spacers and inspect the floor for any gaps or imperfections. Clean the floor with a vacuum or soft broom to remove dust and debris. Avoid wet mopping, as excess moisture can damage the laminate.
Maintenance and Care
To maintain the longevity and appearance of your laminate flooring:
Clean spills immediately to prevent moisture damage.
Use protective pads under furniture to avoid scratches.
Sweep or vacuum regularly to remove dirt and grit.
Use a laminate-specific cleaner for routine cleaning.
Troubleshooting Common Issues
Even with precise laminate floor installation, issues can arise. Here are some common problems and solutions:
Gaps between planks: Check for uneven subflooring or improper locking of planks.
Buckling or warping: Ensure adequate expansion gaps and avoid excessive moisture exposure.
Squeaking floors: Confirm that the underlayment is correctly installed and the subfloor is level.
Enhancing Durability with Proper Maintenance
Proper maintenance is essential for preserving the durability and appearance of laminate flooring. Regular cleaning prevents dirt and debris from scratching the surface. Additionally, using area rugs in high-traffic areas reduces wear and tear, ensuring the flooring remains pristine for years.
Environmental Considerations and Sustainability
Laminate flooring is an eco-friendly option due to its use of recycled materials and minimal impact on natural resources. Opting for products certified by environmental standards ensures a responsible choice that contributes to sustainability without compromising on quality or style.
Laminate floor installation can significantly enhance the beauty and functionality of any space. By following these expert tips and techniques, you can achieve a flawless, professional finish that lasts for years. Whether you’re a DIY enthusiast or a seasoned professional, proper planning, precision, and care are key to a successful installation.
Can laminate flooring be installed over existing flooring?
Yes, laminate flooring can be installed over existing floors, such as vinyl or tile, if they are clean, dry, and level. However, avoid installing it over carpet or any surface with excessive cushioning, as this can compromise stability.
How long does laminate floor installation typically take?
The installation time depends on room size, complexity, and experience level. For an average-sized room, it typically takes one to three days, including preparation and finishing touches. Proper planning and having all necessary tools on hand can speed up the process.
Can laminate flooring be installed over existing flooring?
Yes, underlayment is essential as it provides cushioning, sound absorption, and moisture protection. It also ensures a smoother surface, preventing imperfections in the subfloor from affecting the laminate. Some laminate planks come with pre-attached underlayment, simplifying the installation process.