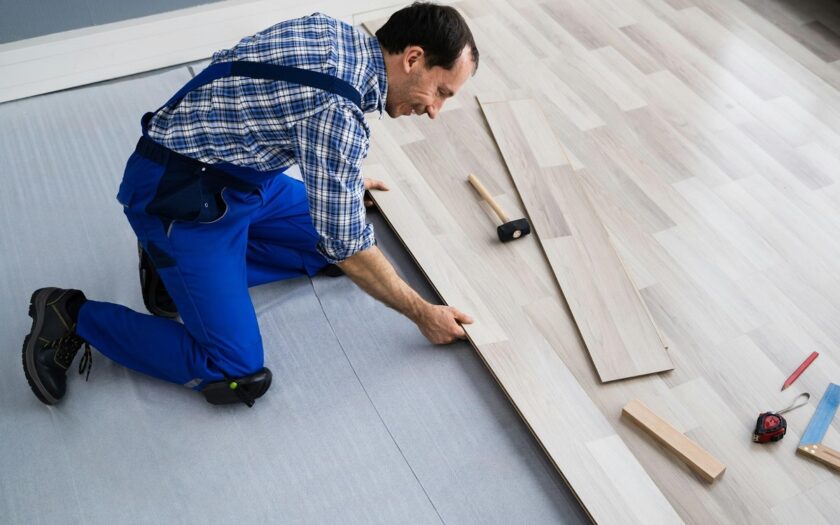
Installing hardwood flooring transforms your living space, adding timeless beauty and value to your home. Whether you’re considering a DIY project or hiring professional hardwood floor installers, this comprehensive guide walks you through everything you need to know about hardwood flooring installation, from selection to maintenance.
Benefits of Installing Hardwood Floors
Hardwood floors aren’t just about aesthetics – they’re an investment in your home’s future. These natural surfaces offer exceptional durability, lasting decades when properly maintained. They improve indoor air quality by eliminating carpet-trapped allergens and can significantly increase your property’s resale value. Unlike synthetic alternatives, hardwood floors develop character over time, becoming more distinctive with age.
Different Types of Hardwood Flooring
Solid Hardwood vs. Engineered Options
Solid hardwood planks are milled from single pieces of wood, typically ranging from 5/16 to 3/4 inches thick. They can be sanded and refinished multiple times, making them ideal for long-term investment. Engineered hardwood consists of a hardwood veneer atop multiple layers of plywood, offering better stability in humid conditions.
Popular Wood Species
Oak remains the most common choice, known for its durability and distinctive grain patterns. Maple offers a lighter, contemporary look, while walnut provides rich, dark tones. Cherry and hickory are prized for their unique coloring and exceptional hardness.
Preparing Your Space for Installation
Subfloor Assessment
Before installation begins, ensure your subfloor is clean, dry, and level. Check for moisture content using a reliable moisture meter – readings should be between 6-12% for optimal installation. Any variations greater than 3/16 inch over 10 feet need leveling.
Acclimation Period
Your hardwood flooring must acclimate to your home’s environment for at least 48-72 hours before installation. Store the wood in the installation space, keeping temperature and humidity consistent with normal living conditions.
Choosing the Right Hardwood Floor Installers
Finding experienced hardwood floor installers makes the difference between a good installation and a great one. Look for contractors with:
- Proven track record and portfolio
- Valid licensing and insurance
- Strong references from recent clients
- Clear, detailed written estimates
- Knowledge of local building codes
Step-by-Step Guide to Installing Hardwood Floors
Installing hardwood floors may seem daunting, but breaking it down into steps makes it manageable:
Layout Planning
Start by measuring your room and determining the direction of installation. Generally, planks should run perpendicular to floor joists. Calculate the number of rows needed and ensure the last row will be at least 2 inches wide.
Installation Process
- Install moisture barrier if needed
- Establish your starting line
- Lay the first row, using spacers along walls
- Secure boards using appropriate nailing patterns
- Continue installation, checking for proper board alignment
- Cut and fit final row
Tools and Materials You’ll Need
For a successful hardwood floor installation, gather these tools:
- Moisture meter
- Pneumatic flooring nailer
- Circular saw and jigsaw
- Tape measure and chalk line
- Tapping block and pull bar
- Safety equipment (goggles, knee pads, dust mask)
Tips for DIY Hardwood Flooring Installation
If you’re feeling adventurous and want to take on a DIY project, here are some tips:
Planning Tips
- Purchase 10% extra flooring for waste and future repairs
- Check floor height transitions early
- Plan your starting point carefully
- Have all tools ready before beginning
Installation Tips
- Mix boards from different boxes to ensure color consistency
- Use proper length fasteners
- Maintain expansion gaps around room perimeter
- Work from multiple boxes simultaneously
How to Maintain Your Hardwood Floors
To keep your hardwood floors looking new:
Daily Care
- Sweep or vacuum regularly
- Clean spills immediately
- Use proper hardwood floor cleaners
- Place mats at entrances
Long-term Maintenance
- Refinish every 7-10 years
- Address scratches promptly
- Maintain consistent indoor humidity
- Use furniture pads
Signs It’s Time to Replace Your Hardwood Floor
Even the best hardwood floors eventually wear out. Here are some signs that it’s time to consider a replacement, Watch for these indicators:
- Multiple boards showing serious damage
- Excessive squeaking or movement
- Signs of water damage or rot
- Boards that can’t be refinished again
- Structural issues in subfloor
Mistakes to Avoid During Installation
Common pitfalls include:
- Skipping the acclimation period
- Improper moisture testing
- Poor subfloor preparation
- Incorrect nailing patterns
- Ignoring manufacturer guidelines
Cost of Hiring Professional Installation
Installation costs vary by region and project scope. Expect to pay:
- Basic installation: $6-12 per square foot
- Custom patterns: $12-20 per square foot
- Stairs and detailed work: Additional $25-35 per step
- Subfloor preparation: $2-4 per square foot if needed
Understanding Warranty and Guarantees
Many hardwood floors come with warranties. Always read the fine print and understand what’s covered:
Manufacturer Warranties
Most hardwood flooring comes with:
- Structural warranty (25+ years)
- Finish warranty (5-25 years)
- Moisture resistance guarantee
Installation Warranties
Professional installers typically offer:
- Workmanship warranty (1-2 years)
- Satisfaction guarantee
- Labor warranty for repairs
Key Takeaways:
- Proper acclimation and moisture testing are crucial for successful installation
- Quality materials and professional installation provide the best long-term value
- Regular maintenance extends floor life significantly
- Understanding warranty terms protects your investment
- Addressing issues promptly prevents costly future repairs
Installing hardwood flooring is a significant investment that adds beauty and value to your home. Whether choosing professional installation or DIY, proper planning, material selection, and attention to detail ensure lasting results. Regular maintenance keeps your floors beautiful for generations.
How long does hardwood flooring need to acclimate before installation?
Hardwood flooring requires 48-72 hours minimum to acclimate to your home’s environment. Place unopened boxes in the installation room, maintaining consistent temperature and humidity levels matching normal living conditions. This prevents future warping or gapping issues.
Can hardwood floors be installed in bathrooms or basements?
While possible, it’s not recommended due to moisture concerns. If you proceed, use engineered hardwood with proper moisture barriers and sealing. Consider moisture-resistant alternatives like luxury vinyl or tile for these spaces to prevent potential damage.
What’s the average lifespan of professionally installed hardwood floors?
Well-maintained hardwood floors can last 50-100 years. Professional installation, coupled with regular cleaning, prompt spill cleanup, and refinishing every 7-10 years, ensures maximum longevity. Quality wood species and proper daily care significantly extend lifespan.


